Sunday, August 4, 2013

New Book and a Giveaway

Craft-A-Doodle: Book Cover
(My doodles on the book cover.)

I am so honored to be one of the contributors for Jenny Doh's latest book Craft-A-Doodle, published by Lark Crafts. I worked with Jenny on her Creative Lettering book, so last year when she invited me to work with her again on this doodle book, I gladly said yes. There are 18 artists in this book and each artist contributes his/her unique doodle exercises for the readers to try (there are 75 exercises in this book!) It's a lot of fun! If you love to draw and doodle, or if you'd like to try, you should definitely check it out.

Craft-A-Doodle: Book Spine

(My doodles on the book spine and inside cover.)

Craft-A-Doodle: Inside Cover 
I am going to give away a free copy of Craft-A-Doodle to one lucky reader. The giveaway is hosted on my Facebook fan page, so you need to go there in order to have your name included in the draw. It is the first post on my wall when you go there, and all you need to do is to like the image, share it on your own Facebook wall, and then leave a comment under my photo so I can have your name listed. I will sign the book with a doodle to go with it, and if you are the lucky winner (picked randomly), I will send it your way no matter where you live (I will pay the postage).

Craft-A-Doodle: Flora Chang section

The giveaway ends this Saturday 8/10 at 1a.m., so make sure you go to my page and leave your comment under my photo before it ends. Good luck! :)

Monday, July 8, 2013

Final week at Lilla Rogers School

Finally, here we are, our last week at Lilla school. This final assignment was definitely unexpected to a lot of us. (By now you probably can already tell, our Ms. Lilla is indeed full of surprise!) Just read on.

For week 5, Lilla covered the gift market, and our Monday mini exercise was all about collections. We were asked to take photos, draw, or scan the stuff that we have been collecting. This is not too difficult because I am pretty much a hoarder when it comes to stuff (LOL). My favorite things to collect are folk art objects. Whenever I go to an antique market, I am always on the look out for sweet folk art toys, paintings, ceramics, or sculptures, especially if the theme is animals, religious/saints, circus/carnival, day of the dead skulls, or Mexican luchadores (stretchy pants, anybody?) I mean, how can you say no to this face?

Folk art luchador

And my paper mache lion, one of my favorite find at the flea market, ever!

Old paper mache lion

I also doodled a couple of my small Mexican themed objects (they are all in my office at work).

Object Doodles

It was so much fun to see all the photos of stuff that my classmates collect! But up to this point, we didn't have a clue what the actual assignment was going to be. Then Wednesday came, and we found out our final assignment was to design a "hyper lush" zipper pouch using our own collections. We could do as much or as little as we want, but we were encouraged to go all out, go crazy, and have fun, in our own style. We could also bring back elements we did for the previous 4 weeks and use them in this assignment if they fit.

I was really challenged at first. My style is usually cleaner and more structured, so this one really got me. But since this is the final assignment, I wanted to use this chance to push myself once again. So not to overwhelm myself, I played with background first, using some of my ink drawings and a flower photo I took in my yard.

Floral Background


Then I thought of the kitty I painted last week for my 2nd collage (I didn't submit that one to our class pool). I thought she might work really well with this hyper colorful background, so I brought her over, and I like her with this background so much better! Here is my final twin kitties zipper pouch design:

FLORA_CHANG_LushKittyZipperPouch_1A_WEEK5

I didn't forget about my folk art toys, either. To honor my little muses, I did another pouch design, mixing photos with some of my doodles. I had to admit I was laughing pretty hard when I was designing this one; it was so different than the stuff I normally would do, but I had a blast! It's kind of weird, huh? But I am sure there is a market for it, haha!

FLORA_CHANG_SummerFleaMarketZipperPouch_1A_WEEK5

So here it, the final week. I feel so fortunate to be in the same class with so many amazing artists. I am really going to miss school, but not for too long, because I signed up for part B of the class starting in October. If you'd like to join us in October, please click here to find out more about the class. I hope you have fun reading my class posts. One thing Lilla keeps stressing throughout the whole course is "People buy your joy!" That has always been my goal since the very beginning, to create artworks that make people happy. I hope you can feel my joy, too! :)

Sunday, June 30, 2013

Week 4 at Lilla Rogers School

Can't believe it's already the end of week 4 at Lilla's school; where did the time go? One more week then we will be done (until October that is, because I signed up for Part B of the course, too.) Again, I am completely wowed by my classmates this week, especially by all the talented painters in the class. For week 4, Lilla covered this market:
 Wall Art Lettering
I didn't really know what to expect for this week, especially when our Monday exercise didn't even involve any kind of drawing. Lilla just simply wanted us to go on a scavenger hunt in our homes. We were told to gather stuff according to the colors for our astrology signs (so that's red & orange for me) plus unlimited amount of neutral colors, and these are the stuff we can use to create our wall art piece later. I don't really collect small stuff but surprisingly still managed to find bunch of little items (plus the thought that I really need to have a garage sale).

On Wednesday we received our assignment, and it was to create an abstract collage wall art piece for shops like Anthropologie or Urban Outfitters. We can do whatever we want, but it needs to have all these elements: words, floral motifs, some kind of traditional media and geometric/organic motifs. We are told to create something that we like and not worry about the clients. We could work digitally but we were really encouraged to explore paint and work with our hands. So that's what I determined to do for this week, not to use my computer at all. I know I am not as comfortable with paint as many artists in my class, and that's exactly why I wanted to push myself.

So I went to our local Urban Outfitters for some inspirations (plus a little shopping), and this is what inspired my piece later:

inspiration: Urban Outfitters Display

And here is what I did. First, I just played with the layout using some wooden discs/squares and a diecut chipboard I found in my house, plus some wood veneers cut into shapes. (Also, some watercolor bits I did from week 2 also got cut up and used in the collage.) The base is a 10"x10" wooden board.

Patchwork Collage WIP

Then slowly I colored some of the pieces and added patterns or drawings. I admit I didn't totally stick to the colors assigned to me. I love colors too much and couldn't help but adding some extra ones.

Patchwork Collage WIP

Patchwork Collage WIP

Spraying a couple coats of clear varnish to all the pieces before final assembly.

Patchwork Collage WIP

And here is the final piece. I made a simple distressed strip frame for it.

FLORA_CHANG_PatchworkCollage_1A_WEEK4

 I finished my piece on Saturday morning and submitted to our group. With no more deadline pressure, I decided to make another piece and just had fun with it (plus my desk was already a giant mess so why not add to it?) I put down layers and layers of paint, distressed them, glued a piece of old pattern paper and a piece of red ric rac I found in my house, and put on some more paint. I had a blast!
 Collage #2 WIP

Then I decide to paint a kitty on my board. It was based on a vintage kitty string holder like this one. Painting vintage kitchen item was fun; I might try to paint a few more later.

Kitty wants a new dress!

So that's it, week 4. It was definitely an adventure for me with all the painting and no computer at all.  At the end, I am really glad that I made something tangible which I can hold in my hands.

Monday, June 24, 2013

Week 3 at Lilla Rogers School

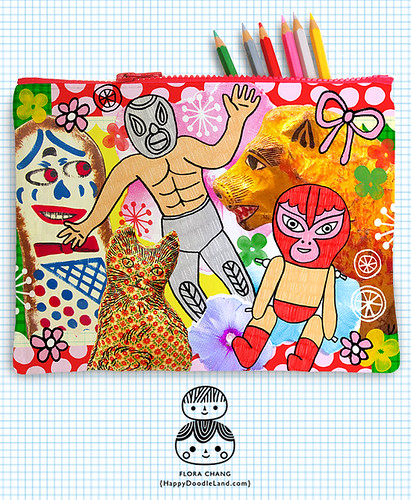
First of all, let me begin this post by giving a shout out to all my classmates at Lilla Rogers School. Seriously, this past week has been a huge challenge for a lot of us, but you all worked so hard like a champion, and I am so humbled browsing all the works that you did. You guys ROCK!!! :)

So without further due, let me show you what I did this week. For the third week at school, Lilla covered this market:

ChildrensBooksLettering72

This is a market a lot of illustrators are either very interested in, or are really intimidated by. I have done a few little books for Hallmark, but those are all in-house jobs and I don't really have a lot of external experience in this market, so I am just as anxious as a lot of people in the class about this week's assignment. But as you've already known from my past posts, Lilla gives us a mini exercise on each Monday to ease us into the actual assignment given on Wednesday, and on this past Monday, we were told to draw snails. Yes, snails. I am sure a lot of us were expecting to be asked to draw something like bears, pigs, kids... after all, it's for children's books, but I don't think any of us was expecting to be drawing snails. But that's what's so great about this little exercise. A snail is not that hard to draw, comparing to most animals, plus they have no arms or legs, so it's a bit more challenging to show their characters and emotions.

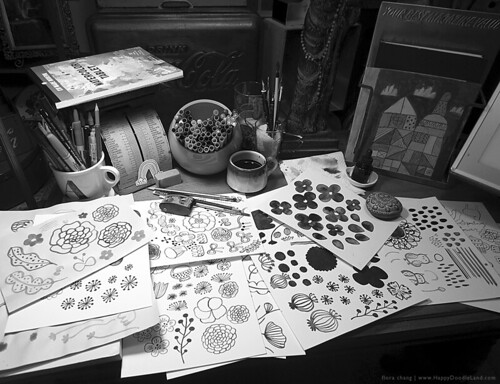
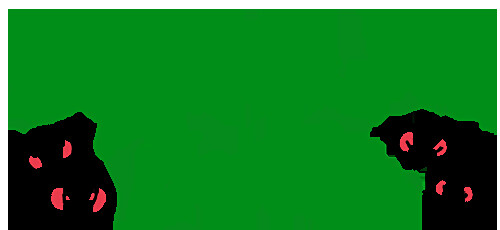
So as usual, we were encouraged to draw as many snails as we could between Monday and Wednesday, without worrying about the actual homework. We were also asked to do some hand lettering for this phrase: "The Snail and the Rose Tree". Here are my unedited snail doodles. The first one are pencil sketches, and the second one were done with a brush tip pen.

SnailCharacterStudy1

SnailCharacterStudy2

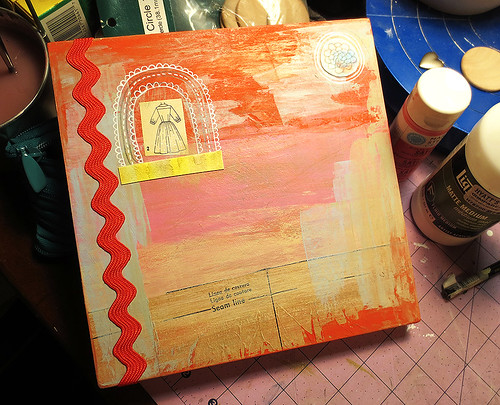
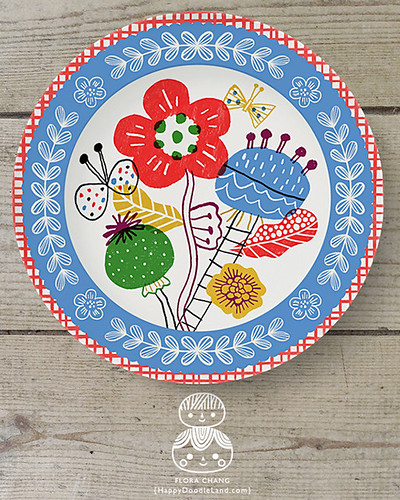
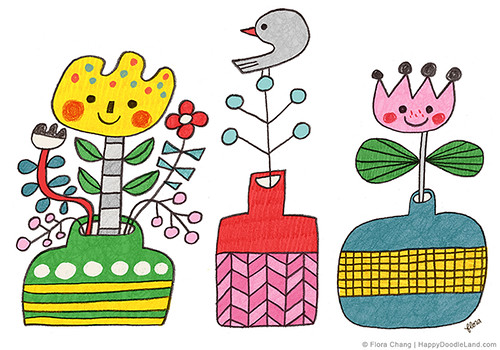
After I was done with all the snail doodles, I picked my favorite little guy and sent him in Photoshop for a quick study in styling and coloring. I also did the hand lettering on the phrase, so I put them together and pretended I was making a book cover, just to see how it might look like.

 Snail Styling Study

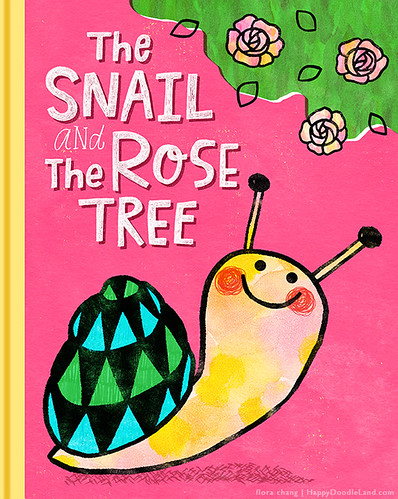
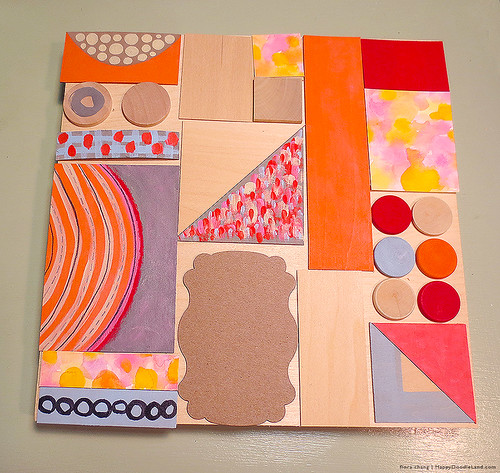
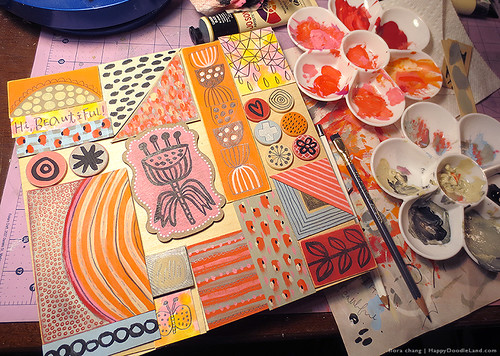
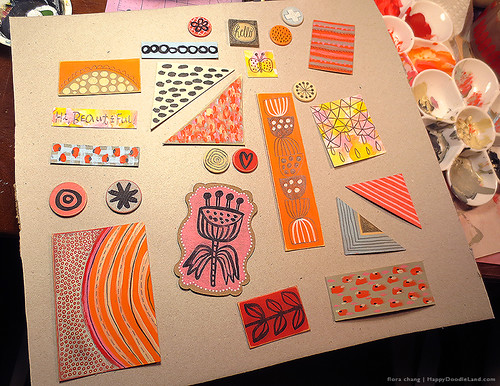
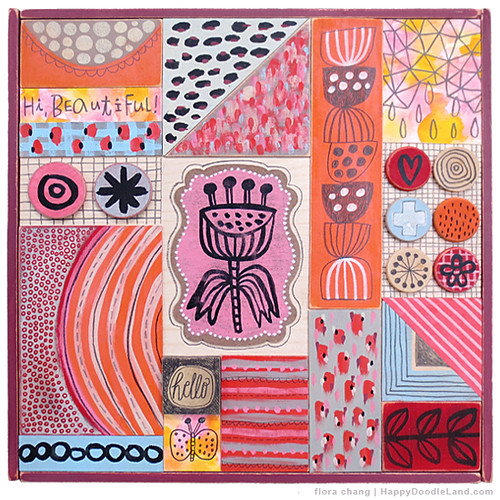
(Did you notice the water color texture I used on the snail's body and in the tree? It was from the watercolor experiment I did last week. See, nothing gets wasted.)

So, Wednesday came, and lo and behold, what was the assignment? You guessed it! The assignment was to do either a book cover or a double-page spread for a story titled "The Snail and the Rose Tree". Yay, right? But wait, here is the curve ball: it's an actual fairy tale written by Hans Christian Andersen, and it's not a happy story at all! (If you are so inclined to read the story, 
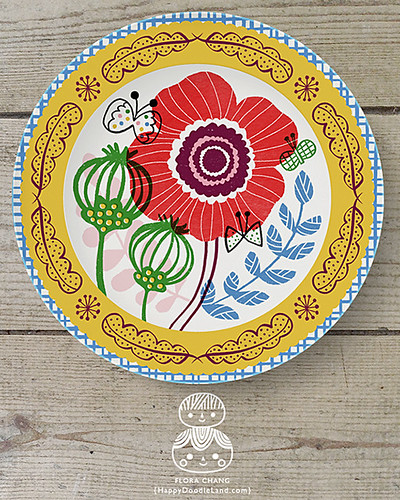
here it is.) I actually really love the story after reading it, but none of my happy little smiley snail doodles would work for the assignment now. I still thought parts of my book cover sketch could work, however it definitely needed some tweaking to fit the darker mood of the story.

FLORA_CHANG_BookCover_1A_WEEK3

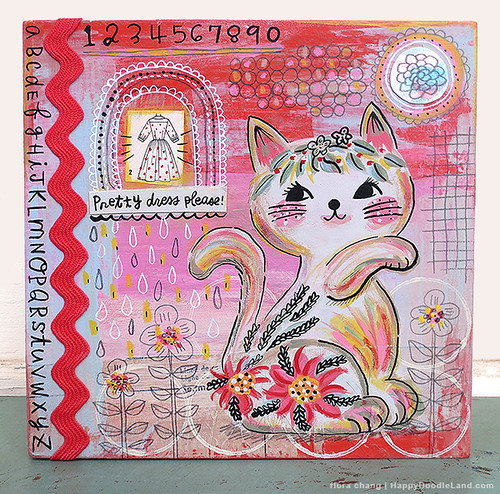
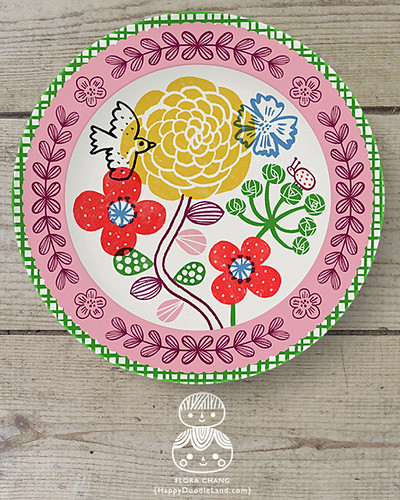
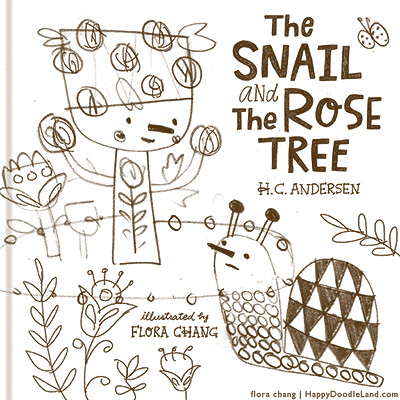
Looked like a simple tweak, but it took me two nights of work to get it right. I went back and forth between a green background and a red background, and finally settled with the red one. After I submitted this one to our class's Flickr pool, I wanted to do another one that's a little more lighthearted. I did a quick rough sketch to show my classmates to see what they think, and they liked it. Here are the rough sketch and the finished piece.

Version2RoughSketch

FLORA_CHANG_SnailRoseTreeCover_1A_WEEK3

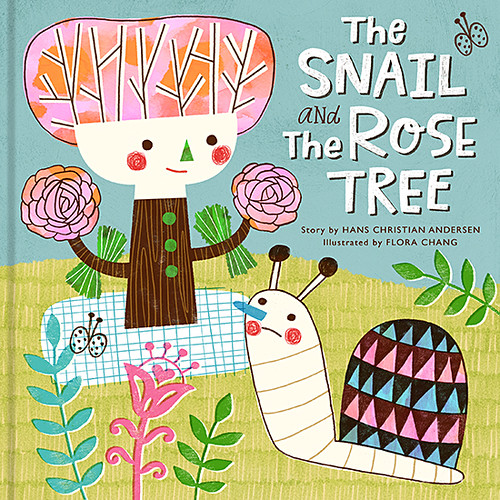
This second version took me even longer than my first one; there were a lot of back and forth in editing, changing colors, and styling of the tree. I also had the hardest time making decision on which one to submit as my final. My designer self likes the first red cover I did, but my illustrator self would rather be doing a whole book in the style of my second cover, so that tells me something. At the end, I made the switch and chose my second cover as my final piece, and I am really happy about it.

Man, that was a long post, isn't it? I hope I haven't lost your interest. If you would like to see other beautiful covers or spreads done by my fabulous classmates, I have picked some of my favorite ones and they are under my Flickr's Favorites. Go browse and be wowed. Enjoy! :)


Monday, June 17, 2013

Week 2 at Lilla Rogers School

Where should I start? Even though I've only been in Lilla's class for two weeks, I have grown so much, and I am sure my classmates all feel the same way about themselves, too. I spent as much time as I could everyday on my second week assignment, and let me tell you, it was a lot of work. I totally feel like I am back at art school, but I am so happy, and I feel giddy when I work on the assignment. I love Lilla's approach; each week she breaks down the assignment for us so we wouldn't feel overwhelmed. On each Monday we get our mini exercise, and on Wednesday we get our real assignment. But because of Monday's mini exercise, by the time Wednesday comes we'll have enough materials to use to complete our homework. It's genius!

Let me show you what I have done this past week. For week two, Lilla covered the home decor market. On Monday and Tuesday, without knowing what the actual assignment would be, I did bunch of drawings using black India ink with my brush and bamboo dip pen, since our mini exercise was to draw lots of pods.

Studio - Week 2 at Lilla 
School

One reason I did everything in black was because I planned to color them later in Photoshop so I was not too concerned about colors at this point.

3 Flowers Linework Sketch

And another reason is, even though I love conventional artworks, I am never comfortable with brush and paint myself. When I saw my classmates' work-in-progress, I drooled! OH MY! There are so many painters in this class and they post the most gorgeous floral sketches on our Facebook wall (we have a closed Facebook group where we are encouraged to share with everybody our work-in-progress photos and feedback for each other, another reason why I LOVE this class). So, as much as I was admiring all the beautiful watercolor and gauche artworks my classmates did, I wasn't brave enough to do it myself at this point, silly me, right?

On Wednesday we got our actual assignment, and it was to design a collection of floral ceramic plates (2-4 pieces per collection). Using my ink drawings from Monday and Tuesday, as well as some butterflies drawings I did for week 1's assignment, I came up with these three designs:

FLORA_CHANG_BlueBorderFloralPlate_1A_WEEK2.jpg
FLORA_CHANG_YellowBorderFloralPlate_1A_WEEK2
FLORA_CHANG_PinkBorderFloralPlate_1A_WEEK2

I am pretty happy with my collection, though I still wish I could've come up with something more painterly and beautiful like many of my classmates' works. So after I finished my last plate design this afternoon, with a 50% off coupon in my hand (a surprise gift that showed up in my email today), I headed to Michaels and got myself some watercolors. I went back home and started to lay down colors on paper, without worrying too much, just played, layers after layers. It was really relaxing, actually! I then scanned the watercolors into Photoshop and combined them with my ink drawings from week 1 & 2, and this little piece just sort of happened on its own; it was like magic...


Watercolor Flowers

I guess I don't have to be so afraid of paint after all. A lesson learned and an unexpected mini break-through, at the end of week two. :) 

Sunday, June 9, 2013

One more set of pattern

I couldn't shake the urge to create one more set of pattern after I finished my first week's assignment at Lilla School. I kept wanting to do a cluster design that is simpler and more straightforward, so I came up with a third design. It's quite different from my two previous sets, more appropriate for kids I think, and I had a lot of fun picking icons from my brush doodles and coloring them in Illustrator.

Chuncky Colored Doodles Pattern, partial details

Chuncky Colored Doodles Pattern

What a busy week! I can't wait to see what next week's class will bring. : )

Saturday, June 8, 2013

First week at Lilla Rogers School

Yay! I survived the first week of Make Art That Sells class by Lilla Rogers! This class is intense (especially for a person who has a full time job), but in a very good way. I have over 400 classmates, and most of them are professional working artists. That alone is amazing, because I learn so much just by seeing what other people do toward the same brief, and everyone is just so unbelievably supportive, helpful, and warm toward each other. If the remaining 9 weeks of the course is like the first week, then I am sure we are all going to grow beyond our imagination. I will try my best to record my thoughts and share what I did for the class along the process.

For the first week, Lilla covered the bolt fabric market. Every Monday we are given a little exercise to do, and on Wednesday we will be given a real assignment which we have until Sunday afternoon to complete and submit our final piece. Our mini exercise for this week was this:

MushroomCasseroleDoodle

Yes, we were to draw mushrooms and vintage casserole dishes, and I probably doodled more than 150 little sketches, mushrooms and casserole dishes combined. Drawing from real life can be challenging, but what I learned from this process is that by the time I hit the 50th mushroom, my hand started to loosen up a bit and the style started to come out.

Week1SketchingProcess

On Wednesday, we were given the actual assignment - to design two different retro kitchen themed fabric patterns. We were also encouraged to design a few coordinated patterns to go with the main ones. I did two pretty different patterns using elements I doodled during Monday and Tuesday. It's fun to see how two designs can look so different from each other using similar elements. Here is a more detailed shot of my first pattern, which is a grid and it's made up with both hand-drawn doodles and vector images:

GridPatternDetails

And the repeated pattern with its coordinated designs:

FLORA_CHANG_GRID_1A_WEEK1.jpg
Here is the detail of my second pattern, using only hand-drawn icons:

RedPatternDetails

And the full pattern in repeat, with its coordinated designs:
 Retro Kitchen - Doodle Icons Pattern

Do you like them? Do you prefer one over the other?

Here are some of my thoughts along the way, not just about the class, but about the creative process in general:
1. Draw, draw, and draw more! There is no shortcut to good design. You have to draw a lot.
2. Experiment. Push yourself and work outside of your comfort zone.
3. Nothing gets wasted, even if you end up using only one element out of 100 sketches. All the hard work you put in will become part of you.
4. Stay positive. Negativity hurts your spirit and hinders the creativity.
5. Surround yourself with supportive people. And don't be stingy with your encouragement toward other people.
6. And, if you have knowledge to share, share it!

That's it for this week. Hope you are all enjoying a nice weekend. Stay creative! :)

Monday, May 27, 2013

Bunch of Stuff

Didn't quite have time last week to update my blog because of a freelance project, so I am just going to update them all at once. I had a little down time today so I was able to play with some different doodle technique. Well actually, it's nothing new, it's just I don't do it too often. I did some pencil line work drawings which I scanned into my computer and then put together in Photoshop.

Vases

And last week I doodled some kitties with brush and ink. I turned them into vector line works with Illustrator and made a fun pattern. I also made some iPad and iPhone cases using this pattern in different colorways and they are now available in my RedBubble shop.

Kitties

Also, I did this piece with many tiny doodle faces. They were so much fun to do. I turn it into a animated gif but you have to go to my website to see the animated version. It's the 4th illustration under the "limited color illustrations" section.

Doodle Faces


Well, that's about it for now! I hope you all have had a nice long weekend!


Thursday, May 16, 2013

Little Baby Owl

Little Owl

A super quick doodle of a little baby owl named Tomsk. My sister sent me this link this morning. I just had to.

Monday, May 13, 2013

I am going back to school

Going to Lilla School
If there is one thing that I absolutely love, it would be learning. And, if I could learn from the best, it's even better. This is why after a long consideration, I decided to invest in myself and signed up for Lilla Rogers' "Make Art That Sells" e-course last night, and I am really glad that I did. I already have bunch of artist friends who also enrolled in this course, so it's going to feel like going back to school with my good friends and it will be so much fun (challenging, but fun!)

Lilla is one of the top illustration agents in the industry; just check out her Lilla Rogers Studio site and you will see why. She will be covering 10 hottest markets in this 2-parts e-course (5 weeks each). Professional-level assignment will be given every week, so this will also be the perfect chance to build up a portfolio. Lilla will also interview some of the industry's top leaders during the class, so you'll learn exactly what the art directors and buyers are looking for within each market. On top of that, there is also going to be a private community space where artists and designers can connect, share their work and support for each other. It's just like going back to art school. If you'd like to learn the details about this invaluable e-course, please click here.

So after reading all this, would you join me and be my classmate? :)

Wednesday, May 1, 2013

Car Ride

Car Ride

Did a fun little illustration for boys. Come take a happy car ride with us! : )

Sunday, April 28, 2013

A little portrait for a little girl named Adora

Portrait for Adora

I'd like to show you a drawing I did for a little girl named Adora. Here is the story:

I received a sweet email from Adora's dad last Saturday. He had Adora 3 years ago, his first child ever, at age 56. Last year he started commissioning artists from all over the world to create artworks based on photographs of his cute baby daughter. Since then, nearly 600 diverse pieces had been published so far on her blog. So when he invited me to draw his precious daughter, I had to say yes.

My drawing is based on this photo of Adora, and I picked the outfit from her other photos.

If you'd also like to participate in this fun project, you can visit Adora's blog for detail. Adora's family often pays a token fee per submission, or make a donation to a charity of the artist's choice.

Adora's blog, artworks + photos of Adora:
www.growababy.com

Adora's blog, artworks only:
www.growabrain.tumblr.com/tagged/Adora_Art

Saturday, April 27, 2013

Shop Update: Unicorn

Unicorn

I have a new art print in my Etsy shop; it's a magical unicorn on sweet bubble gum pink background; it will look perfect in a little girl's room. Also available as iPad and iPhone cases in my RedBubble store.

Unicorn Cases

Wednesday, April 24, 2013

Kokeshi Doodle + New Products

Kokeshi Doodle

Playing around and doodled this kokeshi doll with some new Photoshop brushes I made today. I am also trying to get used to Photoshop and Illustrator CS6's dark interface; it looks quite different from previous versions, but not in a bad way, just need some time let my eyes get used to it.

Update: A lovely reader has informed me that the dark background color in CS6 can be easily changed. Here is the how-to link. Thank you!


Cases featuring my patterns

Also, I just opened a shop on Redbubble, and I have a little selection of iPad & iPhone cases there. (Meanwhile, all my art prints still remain in my Etsy shop). I was told that Redbubble's iPhone cases are pretty good in quality. Also, according to Redbubble, their cases are made by Uncommon, whose cases are chosen by Apple to be sold in Apple stores. You can read about it here. (iPad Mini cases are not available yet, but will be soon.) Too bad I don't own an iPhone myself, but I am going to order myself an iPad case. :)